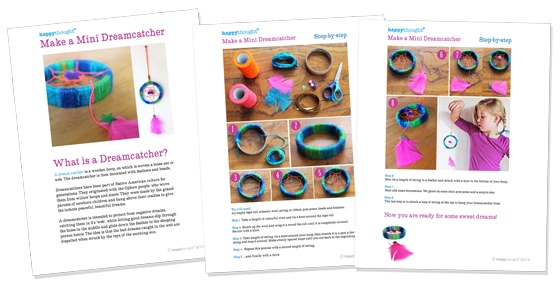
Step-by-step video tutorial: Make a Mini Dreamcatcher and have sweet dreams every night!
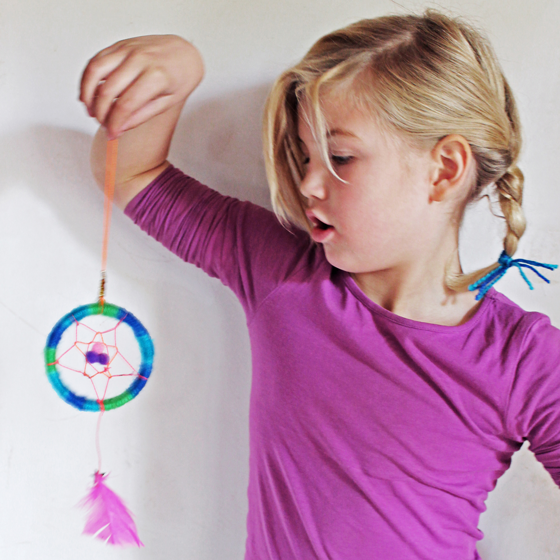
After a particularly restless night Missy and I were longing to make a dreamcatcher, and seeing as everything is mini and cute around here we set our sights on making a mini dreamcatcher.
Dreamcatcher craft ideas: Have sweet dreams every night!
But what to use for the hoop? At first I was thinking bracelets but after a rummage through our art box I struck on the idea of using used masking or sticky tape rolls – economical and re-cycle friendly.
So we gathered up some ribbon, wool, feathers, coloured thread and got to work on our mini dreamcatcher, documenting with photos as we went and not really quite sure what we’d end up with!
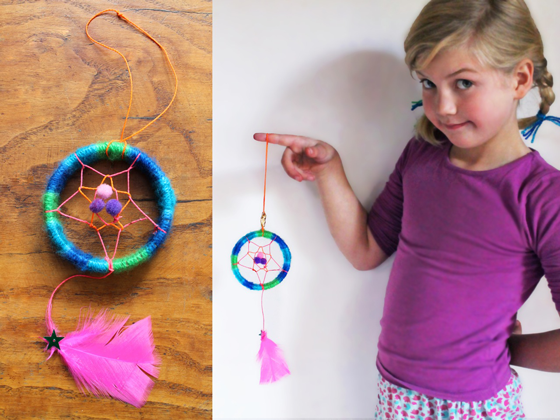
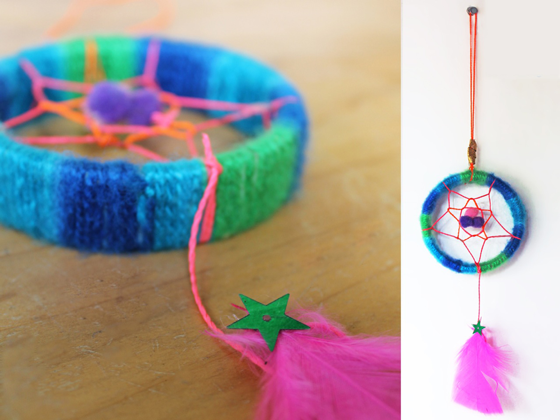
My ‘weaving’ skills leave a little to be desired on the centre of the dreamcatcher (although I think that adds to the charm…well that’s my excuse!) but we are pretty chuffed with the the results and are hoping for sweet dreams from now on. So here’s a step-by-step photo and video tutorial on assembling your dreamcatcher.
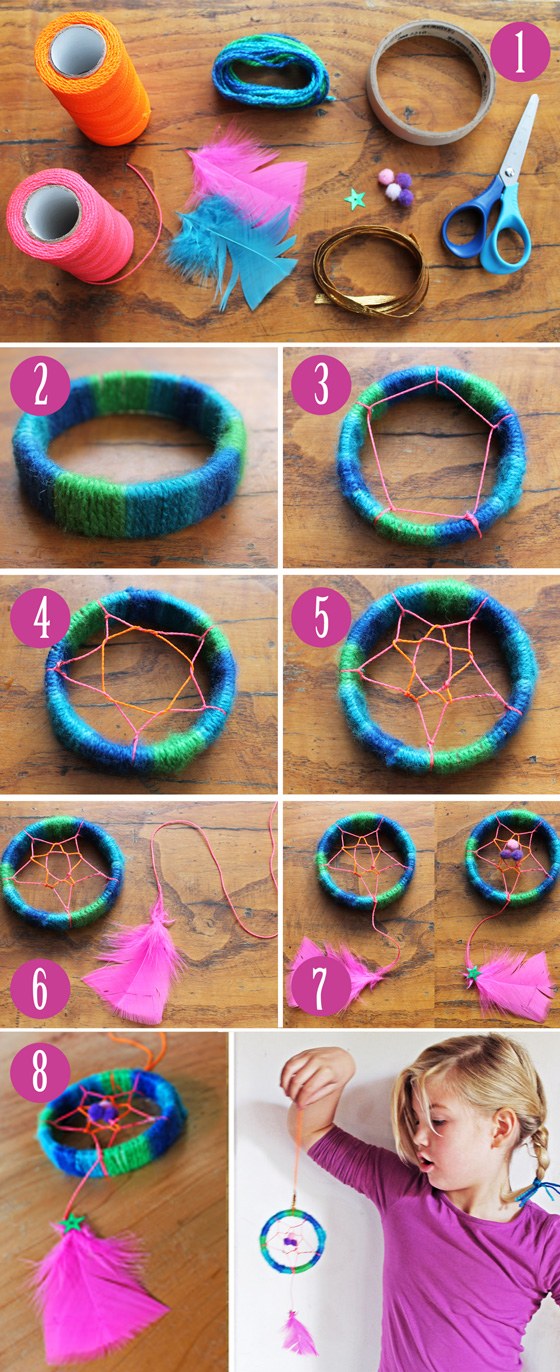
To make your own dreamcatcher you will need:
- An empty tape roll
- Scissors
- Wool or string
- Ribbon
- Pom-poms, beads
- Feathers
How to make a mini dreamcatcher: Step-by-step craft tutorial
Step 1 Take a length of colourful wool and tie a knot around the tape roll.
Step 2 Bunch up the wool and wrap it a round the roll until it is completely covered. Secure with a knot.
Step 3 Take length of coloured string, tie a knot around your hoop then stretch the string to a spot a few centre metres along and loop it around. Continue making evenly spaced loops until you are back at the beginning.
Step 4 Repeat this process with a second length of string…
Step 5 …and again with a third.
Step 6 Now tie a length of string to a feather and attach with a knot to the bottom of your hoop.
Step 7 Next add some decorations. We glued on some mini pom-poms and a sequin star.
Step 8 The last step is to attach a loop of string at the top to hang your dreamcatcher from.
Download free PDF classroom or home school tutorial worksheets: Dream catcher craft ideas!
Click here or the image below to download the Mini Dreamcatcher tutorial PDF.
What is a dreamcatcher?
Dreamcatchers have been part of Native American culture for generations. They originated with the Ojibwe people, who wove them from willow hoops and sinew. They were made by the grandparents of newborn children and hung above the cradleboard to give the infants peaceful, beautiful dreams.
A dreamcatcher is intended to protect from negative dreams, catching them in it’s ‘web’, while letting the good dreams slip through the holes in the middle and glide down the feather to the sleeping person below. The bad dreams caught in the web are dispelled when struck by the rays of the morning sun.
We hope you enjoyed our mini dreamcatcher craft ideas! If so, please give us a little love; by liking us on facebook, pinning us on pinterest or following us on twitter. Thank you!


Cute project for grandchildren!